Configure Dynamic Data Masking using Azure SQL Database portal
In the last blog we got a basic introduction of Dynamic Data Masking feature in this blog post we’ll see how to configure Dynamic Data Masking on Azure SQL Database using Azure Portal.
For the purpose of testing this feature I just provisioned a new database named DDM_sarab on Azure and create a simple Customer table with 3 records. Here is the screenshot of the same:

Configure Dynamic Data Masking
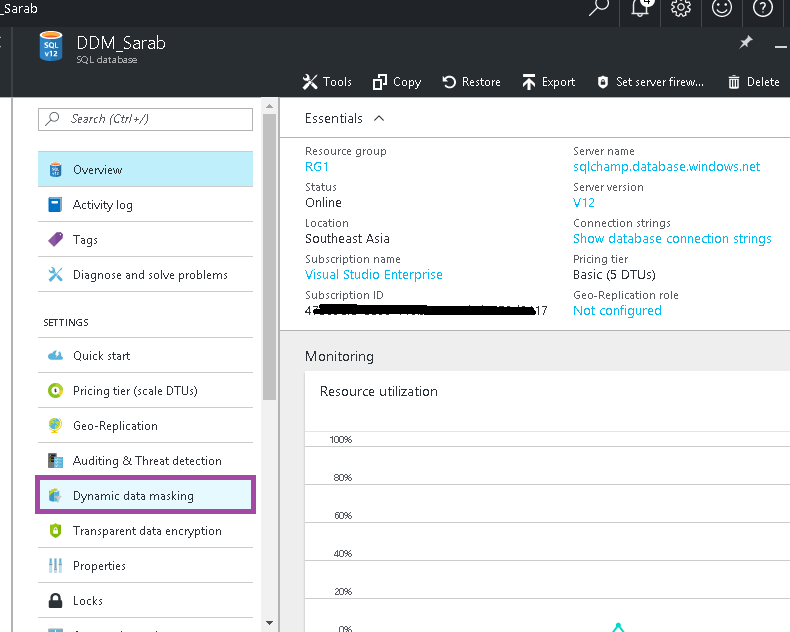
Next was to configure Dynamic Data masking and for this demo we’ll be using Azure portal. Let’s go to Azure portal and select the relevant database, once you are on the database blade you’ll see an option called Dynamic Data Masking.
Once you select Dynamic Data Masking it will open Dynamic Data Masking blade – like the one below. Here you can see there are no Masking rule at the moment but the Azure portal recommends a few columns based on the column Names you’ve given.
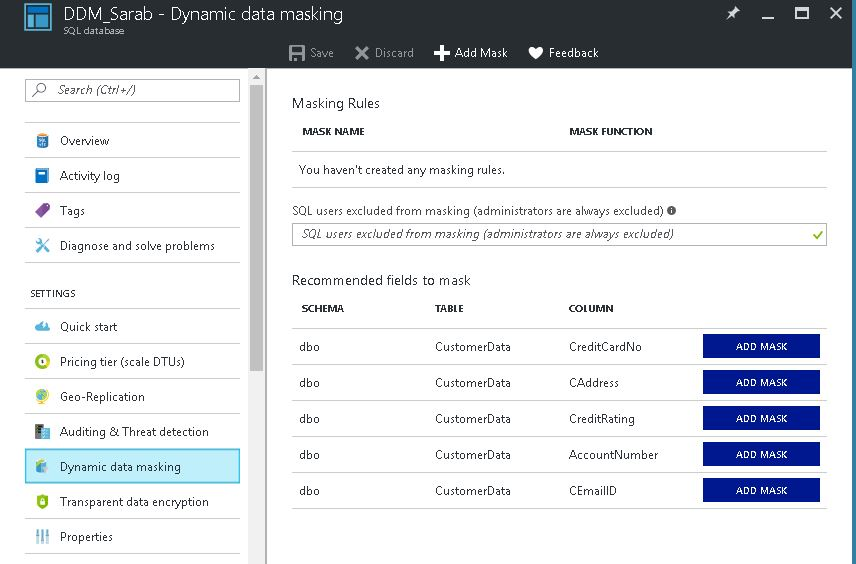
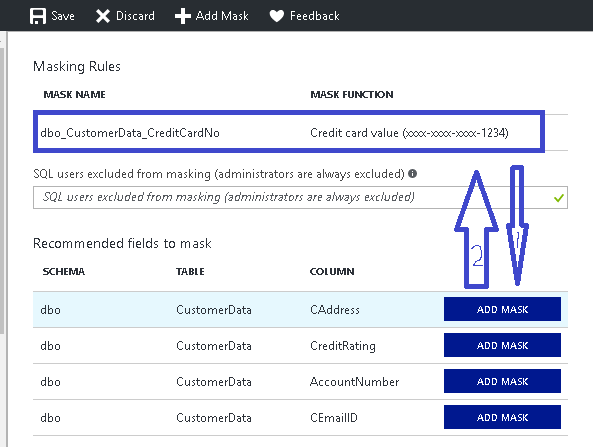
Now you’ve two options ignore the recommendation straight away or just click on Add Mask in the recommendation tab against each column on which you want to apply Masking. I selected the recommendation method. If you select recommendations it will create a rule on its own & choose the best masking method portal thinks is suitable based on the column Name and data type.
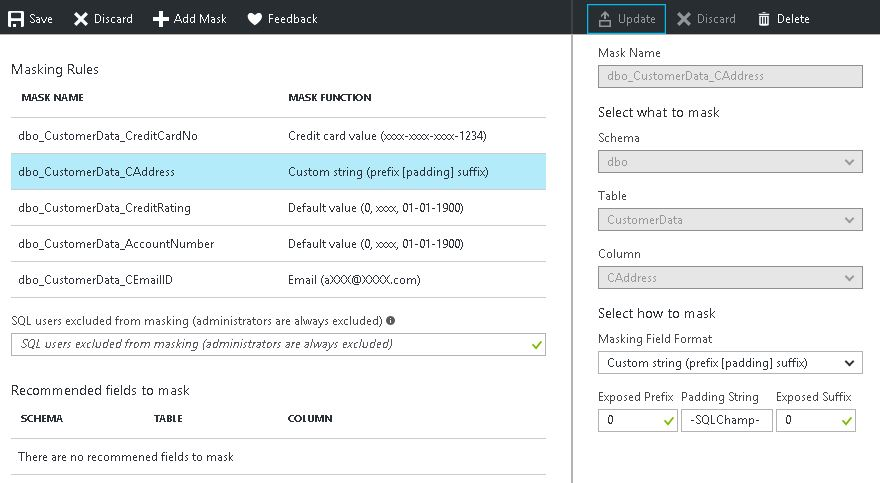
You can however, change the Masking function\rule if you want to by just clicking over the created rule:
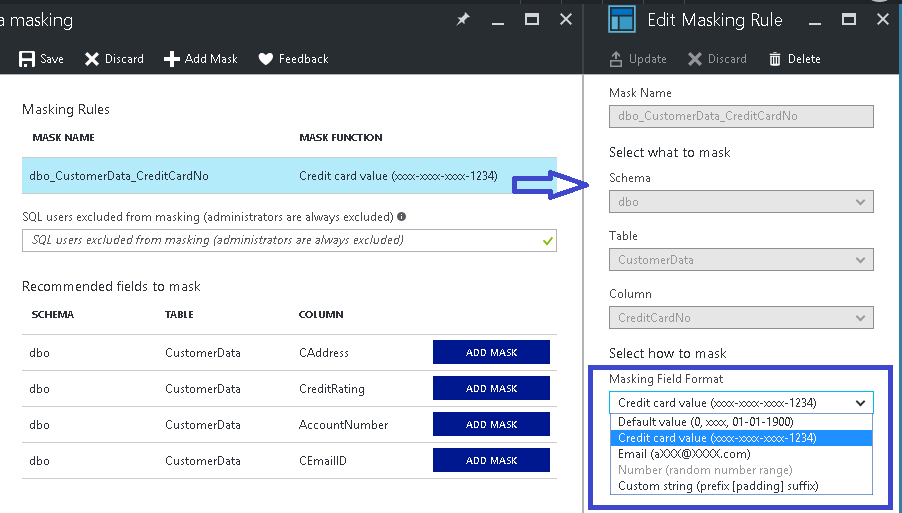
This is how I updated my Address column to make sure nothing from the address is visible and only a text like “-SQLChamp-” gets printed for each result.
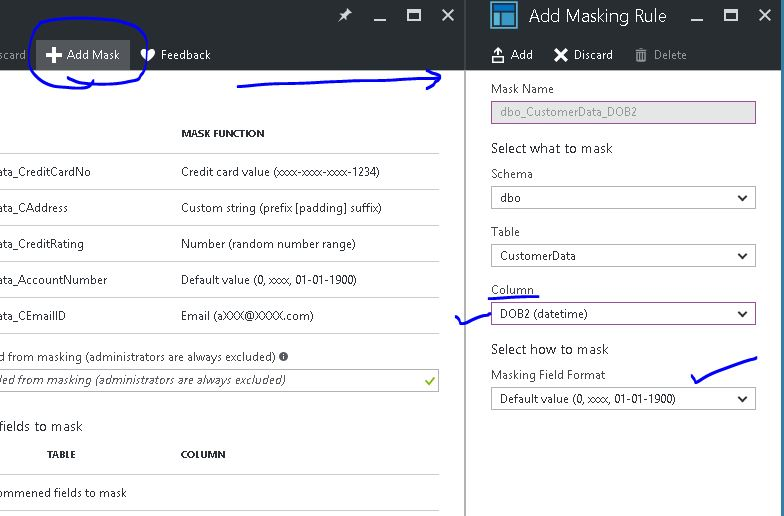
If in-case you want to apply Data Masking over a column which has not picked-up by Azure as recommended column you can do so by just clicking over “+Add Mask” which will open Add Masking Rule blade so that you can select the column you wish to mask and the type of masking you want to apply over it, Look at the screenshot below.
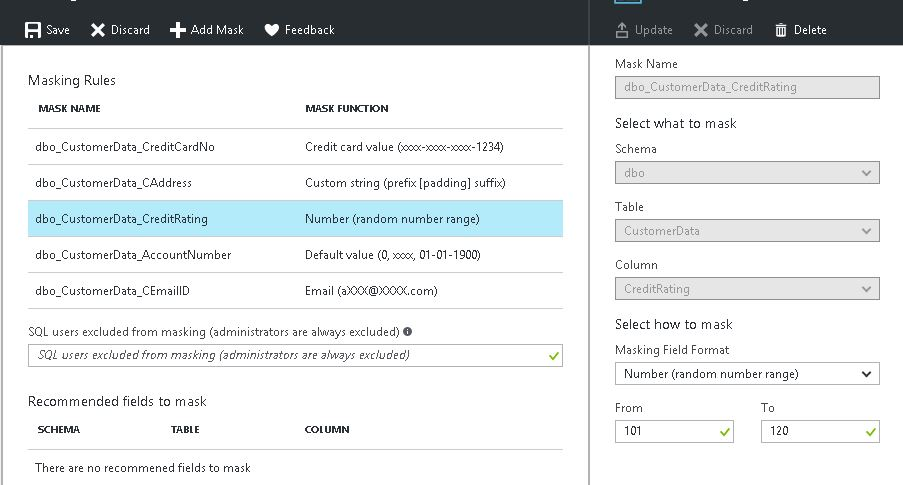
This is how I changed the credit rating column masking to a random number and provided a range to pick a random number which will be picked automatically at the time of showing the results to the end-user.
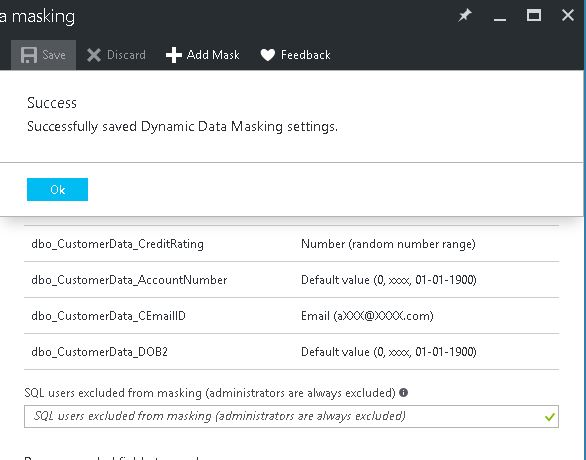
Finally after making all the changes I saved my masking rules so that they can be applied.
Now as you know by default all your administrators are allowed to see un-masked data so I created a new login named CustCare1 to test & cross verify the feature. Pay close attention to the message highlighted below.

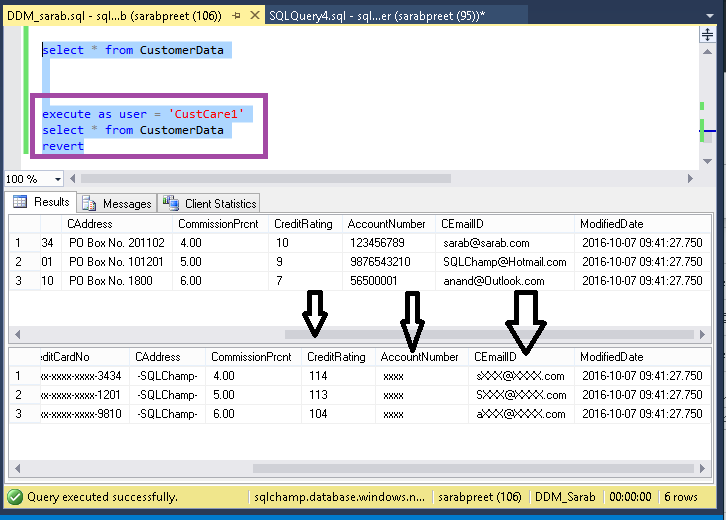
Configuration completes successfully, now let’s verify. Let’s query the database using both the logins, for the sake of showing you the real effect I am selecting the table two times; the first time just as myself (administrator) and second time using Execute as clause to see how the data is visible to another user:
Look at the difference below: the data has been masked as configured.
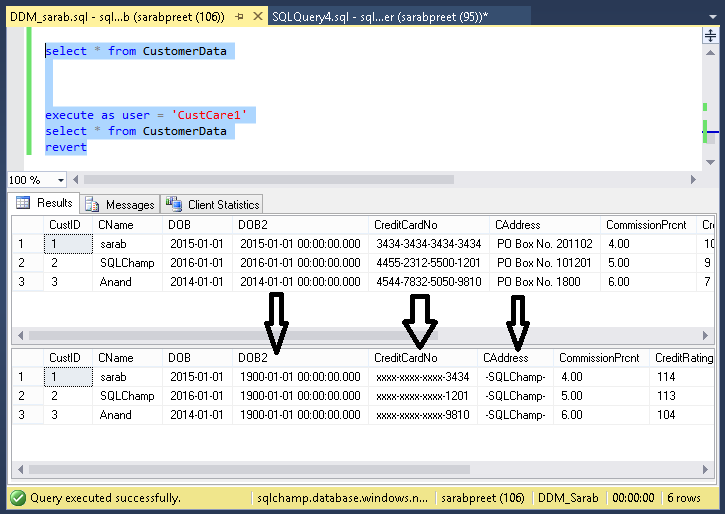
Look at the difference below: the data has been masked as configured.
Congratulations you’ve just implemented Dynamic Data Masking successfully.
Want to know how to Configure Dynamic Data Masking using T-SQL? Read here…
Hope you learned something new! Happy Learning!
feel free to leave a comment. 🙂
Thanks,
Sarabpreet Singh Anand
Subscribe now to get latest Tips\blog posts in your Inbox
Follow @SQLChamp
Follow @Sarab_SQLGeek