Configure Active Geo Replication using Azure portal
In the last blog post we learned the basic concepts of Active Geo Replication, in this blog we’ll see how to configure Active Geo Replication using Azure portal. We’ll go step-by-step and see each and every step in detail. Let’s begin.
A few things to note:
- Please make a note, that you must be the subscription owner or a co-owner in order to create a secondary database & configure Geo replication.
- The secondary database will have the same name as primary database.
- Your secondary database will have the same service level as your primary database.
- You can choose the readability of your secondary database, it can be either readable or non-readable.
- You can also configure active Geo replication for your elastic databases.
Steps to configure Active Geo replication using Azure Portal
Select the appropriate database from SQL Databases blade & choose Geo-Replication option under the settings head.
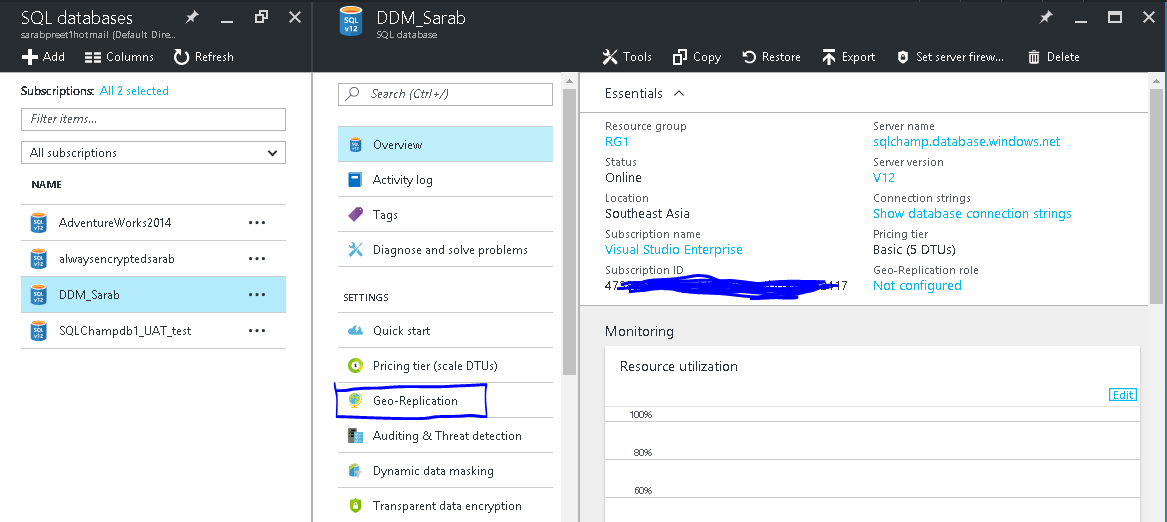
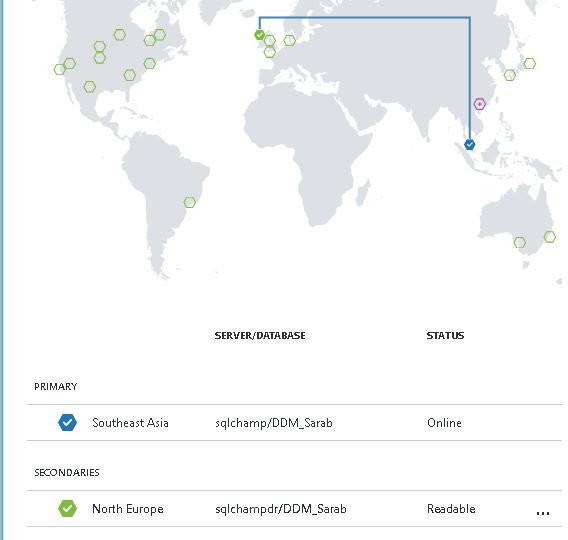
Once you Select Geo-Replication option, this will open Geo-Replication blade which shows a graphical representation of world map showing Azure data center regions and also recommends based on the primary database region, like in my case the recommended region is East Asia.
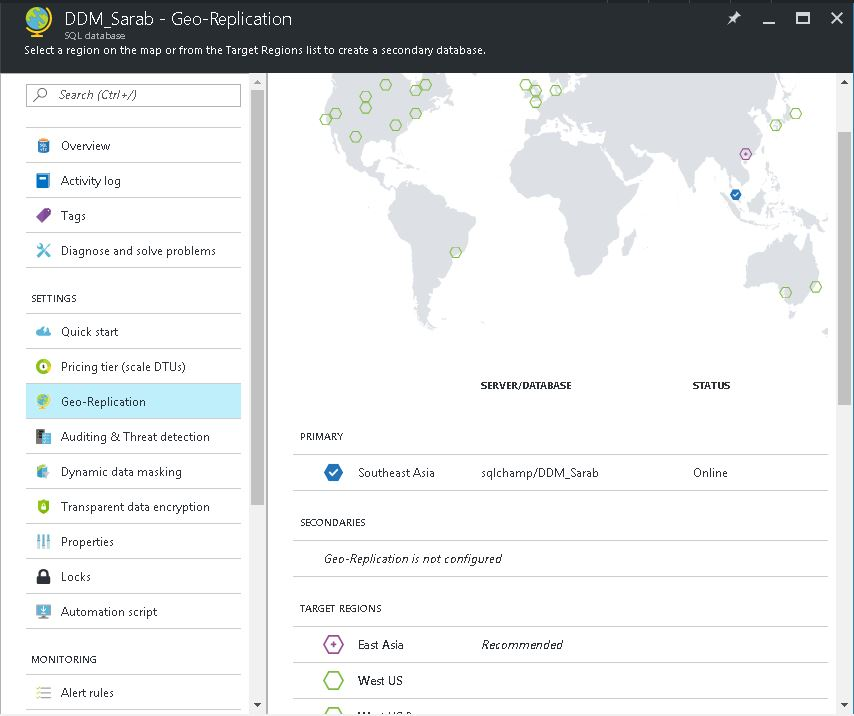
Apart from recommended region it also lists down all other available regions where the SQL Database feature is available and can be selected as a secondary region.

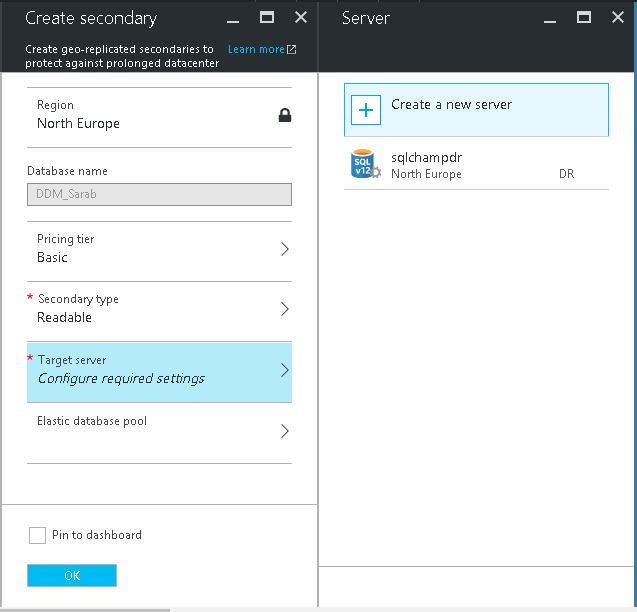
It is always suggested to go-ahead with the recommendations but if you want you can also select any other available region as your secondary region. In my case I selected North Europe as secondary region.

Once a region has been selected you can configure the rest of the settings like secondary target server, service tier etc. I already have a SQL Server in North Europe region which can be selected for this purpose.
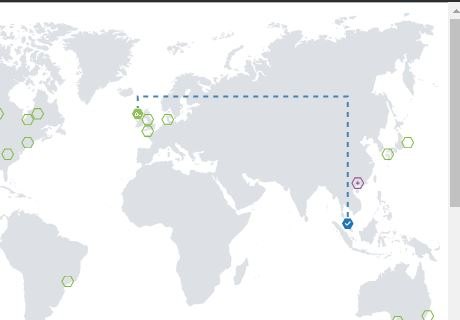
Once all the settings are done azure will start seeding the database between both the regions & the map will show dots travelling from primary to secondary region. The seeding time depends upon the size of the data.
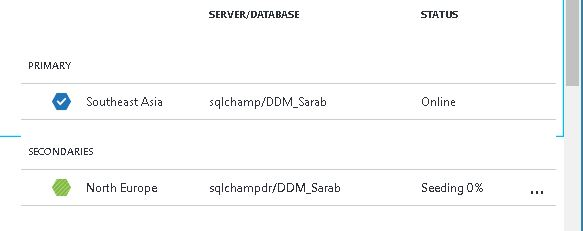
Once the seeding completes the secondary database will be available for failover and readable workload (if it is configured to be readable) & the data replication will begin.
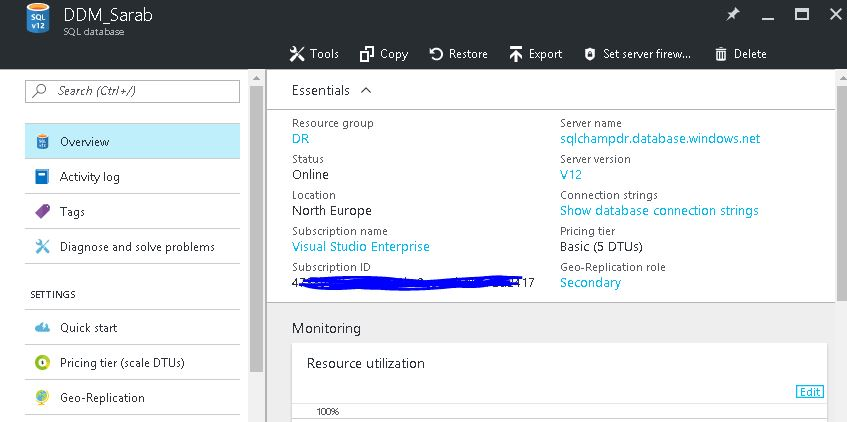
The secondary SQL Database blade will show the geo-replicated role as secondary, please refer the screenshot below.
With this you’ve learned how to configure active Geo replication using azure portal.
Hope you got answer to your questions! Happy Learning!
feel free to leave a comment. 🙂
Thanks,
Sarabpreet Singh Anand
Subscribe now to get latest Tips\blog posts in your Inbox
Follow @SQLChamp
Follow @Sarab_SQLGeek