How to create a new database using SQLAzure?
Hi Friends, in the last post we summarized the main differences between running your workload on SQLAzure and SQLServer on Azure VM. In this post we’ll see how to create a new database using SQLAzure?
You must have an Azure subscription in order to start provisioning your own databases using SQLAzure, If you don’t have one but still want to learn and explore Azure– refer to my Pro-Tip to get a free trail limited subscription of Azure.
Step-by-Step to create a new database using SQLAzure
Login to Azure portal http://portal.azure.com after authentication, you’ll land up on the Dashboard of Azure Portal which looks like this:
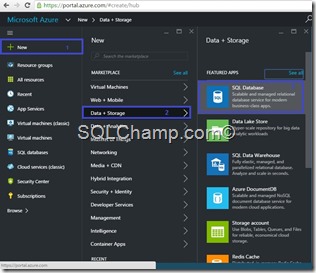
Now use the quick create wizard – click the + New Link from the left panel & follow the path like: +New > Data + Storage > SQL Database option.
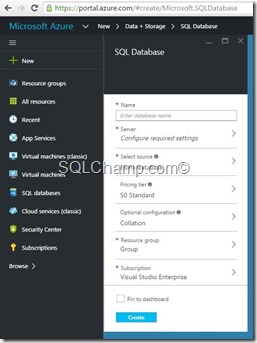
Once you select the SQL Database you’ll get the quick create form to fill in the basic details for a new database. The fields are pretty simple and self explanatory, but let me give you some level of basic understanding.
Name: Needs a unique name for the DB in a particular server.
Server: You’ll be asked to choose a SQLServer if one already exists within this subscription else you’ll have an option to create new Server.
Along with Server Name (Server Name must be unique globally) you must also provide Server admin login, its password and its location (data centre location)
Imp: here is an important step, if you want to get latest update and all features which are available in V12 select Yes in this option.
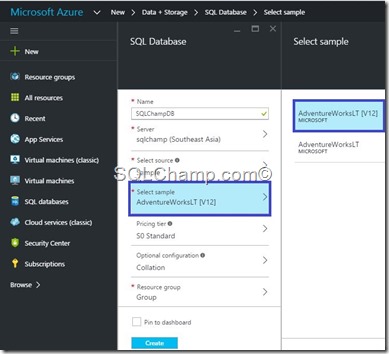
Once the server is created you can move to the next important option (Select sample) which lets you choose whether you want a blank DB or a DB with sample data (AdventureWorksLT)
I like this option a LOT, look at the future thinking and the usefulness of the feature, you need to test the DB\App\Load of the DB with SQLAzure if this option is not there, after creating the database you must create schema & generate lots of data before you can proceed any further or the easy option would have been to import AdventureworksDB which will again take time\efforts. By giving this option your database get’s provisioned with all sample data in one shot & you are ready to hit it. ![]()
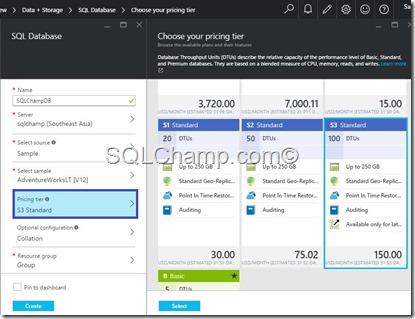
Now comes the critical thing – Service tier\Pricing tier. This option lets you control the performance you can expect from the DB and at the same time project\plan your cost\billing.
In this DB Creation i have selected S3 Standard which means I’ll get 100DTUs performance and I’ll be charged at 150$/month which is estimated billing.
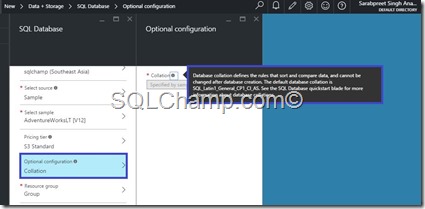
Collation setting is optional, but don’t take it lightly apart from all the data related issues which you might face, the worse is you won’t be able to change it post DB Creation so plan accordingly. The default collation of a Database in SQLAzure is SQL_Latin1_General_CP1_CI_AS.
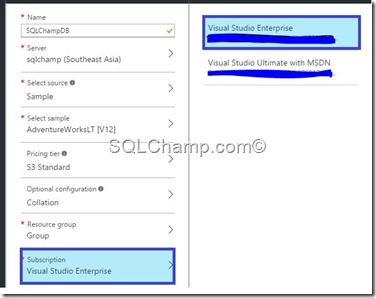
The last option is Subscriptions and i get two options because i hold two current subscriptions, you might see only 1 here which is OK.
If you want to Pin the DB on your dashboard you get this checkbox for the same.
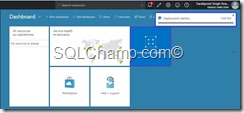
Once you finalize every option and click create you’ll be back to your dashboard where a nice looking animation starts showing the creation of the SQL Database till its created.
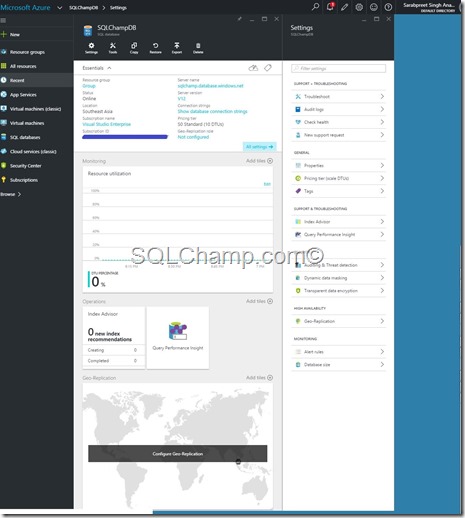
and once the DB gets created you can see its properties Like this (Click on the Pic below to open it full screen to read it properly)
Finally you just learned how to create a new database using SQLAzure.
Hope you enjoyed the post, feel free to leave a comment. ![]()
Thanks,
Sarabpreet Singh Anand
Subscribe now to get latest Tips\blog posts in your Inbox
Follow @SQLChamp




nice one…Well explained in simple words…liked the post
Pingback: Azure SQL Database firewall rule Deepdive–Part1 - SQLChamp